前回に引き続き、Angularのアプリケーションの作成を進めていきます。
現在のAngularでは、リストの表示と詳細の表示を1つのファイルにまとめて書いています。
保守性の高いプログラムにするために、詳細の表示を移します。
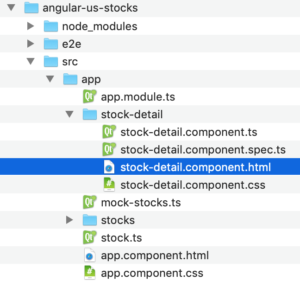
StockDetailComponentを作成しましょう。
ターミナルでAngularのgenerateコマンドを打ち、新しいコンポーネントを作成しましょう。
user@computer$ ng generate component stock-detailContents
Angularのtemplate を記述する
Angularのstock-detail.component.htmlに記述します。

stock-detail.component.tsファイルの修正
Angularのstock-detail.component.tsファイルを次のように記述します。
import { Component, OnInit, Input } from '@angular/core';

import { Stock } from '../stock';
@Component({

selector: 'app-stock-detail',

templateUrl: './stock-detail.component.html',

styleUrls: ['./stock-detail.component.css']

})

export class StockDetailComponent implements OnInit {

@Input() stock: Stock;
constructor() { }
ngOnInit() {
}
}
StocksComponentテンプレートを更新する
StocksDetailComponentのセレクターは ‘app-stock-detail’です。
Angularのstocks.component.htmlファイルを次のように記述しましょう。
機能が変更されました。
StockDetailComponentが StocksComponentの代わりに詳細を表示するようになりました。
ここまでで、次を行いました。
Angularのgenerateコマンドで、stock-detailコンポーネントを作成しました。
stock-detail.component.htmlを作成しました。
stock-detail.component.tsにInoutと@Input( )stock: Stock;を記述しました。
<app^stock-detail[stock]=“selectedStock”></app-stock-detail>を追加しました。